|
VR Tunnelling Pro UE4
Plug-and-Play VR Comfort
|


|
|
VR Tunnelling Pro UE4
Plug-and-Play VR Comfort
|
|
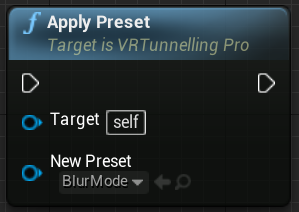
Presets offer a quick, easy, data-driven way to change settings on the fly. These assets are created in the editor and applied at run-time using the ApplyPreset method, either from code or from Blueprints.
By creating a number of presets, you can give your users the ability to easily change comfort settings through an options menu. Offering these options to users (including the option to disable tunnelling) is strongly recommended as different users respond to different solutions.
TIP: Best practice is to offer users presets, but also allow them to change individual settings if desired. This lets users quickly find the right "ballpark" with presets, then tweak details.
To create a preset, right-click in the Content Browser panel to bring up the Create Advanced Asset menu, then select:
Miscellaneous > VR Tunnelling Pro > Data Asset
Then from the Data Asset picker, choose between:
VRTPPresetData to create a preset for the desktop VR Tunelling component
or
VRTPMPresetData to create a preset for the mobile VR Tunelling component.
This creates an asset you can edit. You can then drag the preset asset into the field in the editor, or set it in code or Blueprints using Apply Preset.
TIP: Both the desktop and the mobile components support presets, but be sure to create the correct data asset for the corresponding component type used within your project.
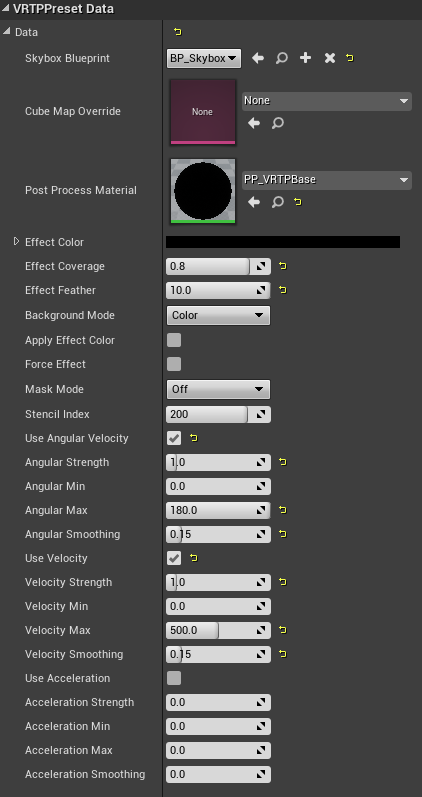
Settings on a Preset asset match all of those on the VRTunnellingPro component, but are all shown at once regardless of modes. This can be overwhelming but allows full, detailed control for advanced users.
TIP: Toggling the Enable Preset parameter on the VRTunnelling component attached to your player will store all of the previous effect settings as a 'snapshot', so that disabling the preset returns the plugin to those previous settings.
 1.8.15